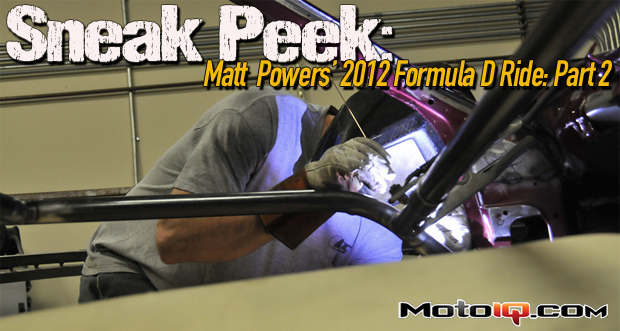

Matt Powers 2012 Formula D ride Part 2
By Mike Kojima
In our first article we showed you how Matt Powers Crew Chief and fabricator Costa Gialamas prepped the Nissan S14 chassis for its conversion to pro drift car spec. Now we watch as Costa shows the right way to build a cage.
 |
A cage is only as strong as its base. A lot of you are probably used to seeing a typical cage where the tubes weld to a big square plate on the floor. This minimalist way of attaching a cage to a car's unibody structure has few good points other than it's cheap and easy. A cage has two main functions, to protect the driver and to stiffen the chassis. To do this well, the cage has to be attached to the main structure of the unibody, not just convenient sheetmetal. Costa starts the cage build by fabbing up the floor plates. The floor plates are complicated pieces that attach to the main frame rail of the chassis as well as the surrounding floor and ring module of the unibody. This is where the forward tube joins the floor near the front of the car. It is as close to bombproof as you are going to get. |
 |
| Costa first uses paper to make the patterns for the plates before transferring them to metal. This is where the main hoop ties in. Note how the plate attaches to the main frame rails and all the surrounding structure. This is many times stronger and more rigid than simply zapping a plate to the floor sheetmetal. |
 |
| The paper pattern is transferred to sheetmetal and fitted to where it will be welded in. |
 |
| Costa welds the metal in place with a Tig welder. This is the area where the forward tubes meet the floor. The tubes are going to be on the frame rails as far forward as possible in the chassis. In Formula D two drivers have suffered from leg injuries due to the cage tubes simply being welded to plates on the floor forward of the dash. In fact many drift and road race cars have their cages built in this way. In a hard impact to a wall, the front wheel is often driven back through the wheel well, breaching the driver's compartment to injure the legs. In our opinion this is how cages must be built in this area. This can greatly reduce the chances of leg injury. |
 |
| For the rear legs, most fabricators simply weld plates to the shock towers and have the legs attach to that. Costa wraps the entire tower with metal to spread the load out as much as possible. |
 |
| Costa caps off the shock tower as well. The tower is made of a thin gauge metal and this really makes for a stronger piece that is not only safer but also contributes a lot to coupling the chassis to the cage for maximum rigidity. |
 |
| A pattern for the main hoop is made of plywood and cardboard. |
 |
| This ensures a nice and tight hoop fitment. |