
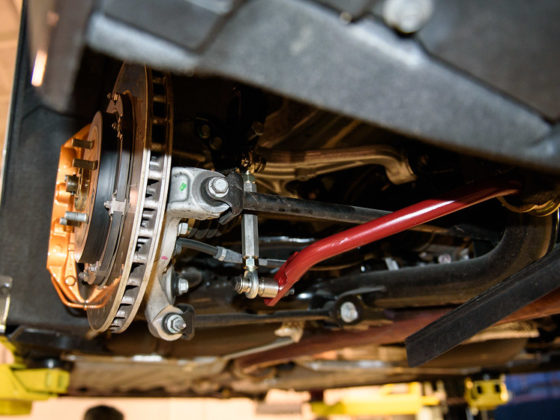
The rear tension rod is probably the most overlooked suspension arm on an s-chassis. A lot of people don’t understand how it works, and there is a lot of conflicting information on the internet to add to the confusion. Because of this, when most people get adjustable arms for the rear of their car, they just set their tension rod to the same length as factory and leave it.
Today, we are going to show you how to properly set your tension rod. We will be making a very simple jig that will allow us to measure the toe curve of the rear suspension so that we can see the impact of our adjustments. Before reading this article, you should read our DIY String Alignment Guide to familiarize yourself with the alignment techniques we will be using.

The problem with leaving the tension rod set at factory length on a drift car, is that drift cars tend to run zero camber. In order to get zero camber, people typically lengthen the RUCA (Rear Upper Control Arm). This leaves you with a huge disparity between the RUCA and tension rod arcs, which gives you a very wacky toe curve. Essentially, the rear suspension will gain anywhere between ½” to 1” of toe out during the entire compression stroke (as the wheel goes up).
It’s pretty common to see drift cars run absurds amounts of rear toe, I’ve personally seen people run as much as 1” of toe in in the rear. People tend to do this when they have tension rods that are set too short, so they increase their static toe. That way when the car squats and toes out, it still maintains at least some toe in. This is the only way they can maintain any semblance of forward bite.

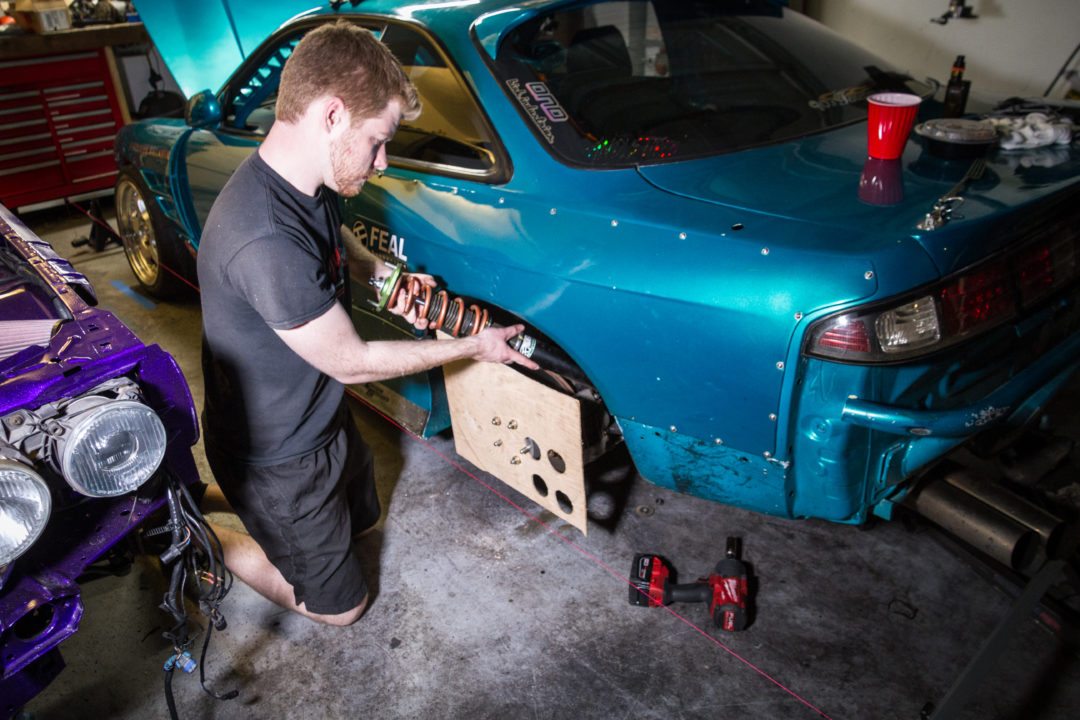
Meliton was very frustrated with his car. He told me that his rear end felt very lazy and unpredictable during transitions. He also described a weird phenomenon, where his car would only dive into a corner when he was off-throttle. After processing what he told me, I asked Meliton what his tension rod was set at. When he replied “stock”, it all made sense. I knew what we had to do.
Before we can start playing with the tension rod, it’s very important that we set the track width (if adjustable), ride height, camber and toe to the settings that we want first. All of those settings affect the position and sweep of the knuckle, which means that you will need to readjust your tension rod if you change them. You don’t really have to worry about it if you make small tweaks, but if you decide that stance is life and drop your car 4 inches and add 3 degrees of camber, you should definitely re-adjust the tension rod to make it work with the new settings.

2 comments
awesome article!!
I’d like to know what adjustment I would need to make if i wanted my suspensio to toe in on compression and how to make my rear suspension squat under throttle
This article just changed my life. I had to recently swap out an aftermarket tension rod after it had been bent and thought to myself, “wtf does this even do?” Then BAM, this article gives me not only the information but the awesome visuals to better understand.
Phenomenal write up and I cant wait to see how my S13 feels after a proper adjustment.