
Rebuilding a Nissan R200 Differential to be More Drift Happy with Z1 Motorsports!- Part 2: Tuning the Differential and Installing the Ring and Pinion
Where we last left off, we had disassembled, cleaned and inspected all the parts of my differential. Now the fun and important stuff starts- setting up my limited slip differential to work better for the specific demands of drifting. We will also show how to set up a new ring and pinion gear set.
Read Part One Here!

The ring and pinion gear is a highly stressed part in a drift car and the R200, although pretty strong, was not designed to take the torque of a large LS V8. To help improve the longevity of the ring and pinion and to make it run cooler, we first sent the gears out to a local aerospace shotpeener around the corner from our shop to get two-stage shotpeened.
Two-stage shotpeening means that the part is first hit with big shot for maximum surface compression, then a smaller sized shot to get in the gear tooth roots better. Shotpeening greatly increases the part’s fatigue strength or the number of stress cycles before failure.
After shotpeening, we WPC treated our gears. WPC treatment is a Japanese process that is very similar to shotpeening, except it uses a microscopic media shot at very high velocities. WPC gives a very fine, slippery, hard lubricious surface finish that reduces friction and operating temperature greatly. It also increases fatigue strength and enhances the shotpeening.
For more information on WPC, check this out!

1.5-way diffs are generally better for road racing, as they tend to understeer less on turn in but are considered worse for drifting because they are less consistent in transitions, off and on the throttle and are harder to initiate a drift.
In the Pro drifting world, most cars either run a spool differential, which has no differential action or a very tightly locked limited slip. So to get around our diff being a 1.5-way, we are going to shim it very tightly to greatly increase the initial preload so it works more like a spool.
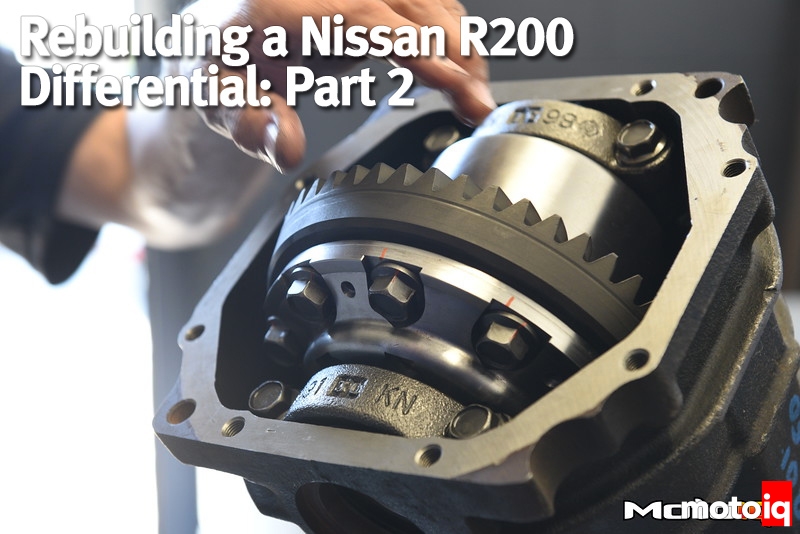
<p”>To get started, George first removes the four counter-sunk bolts, which hold the Kaaz limited slip differential together.</p”>